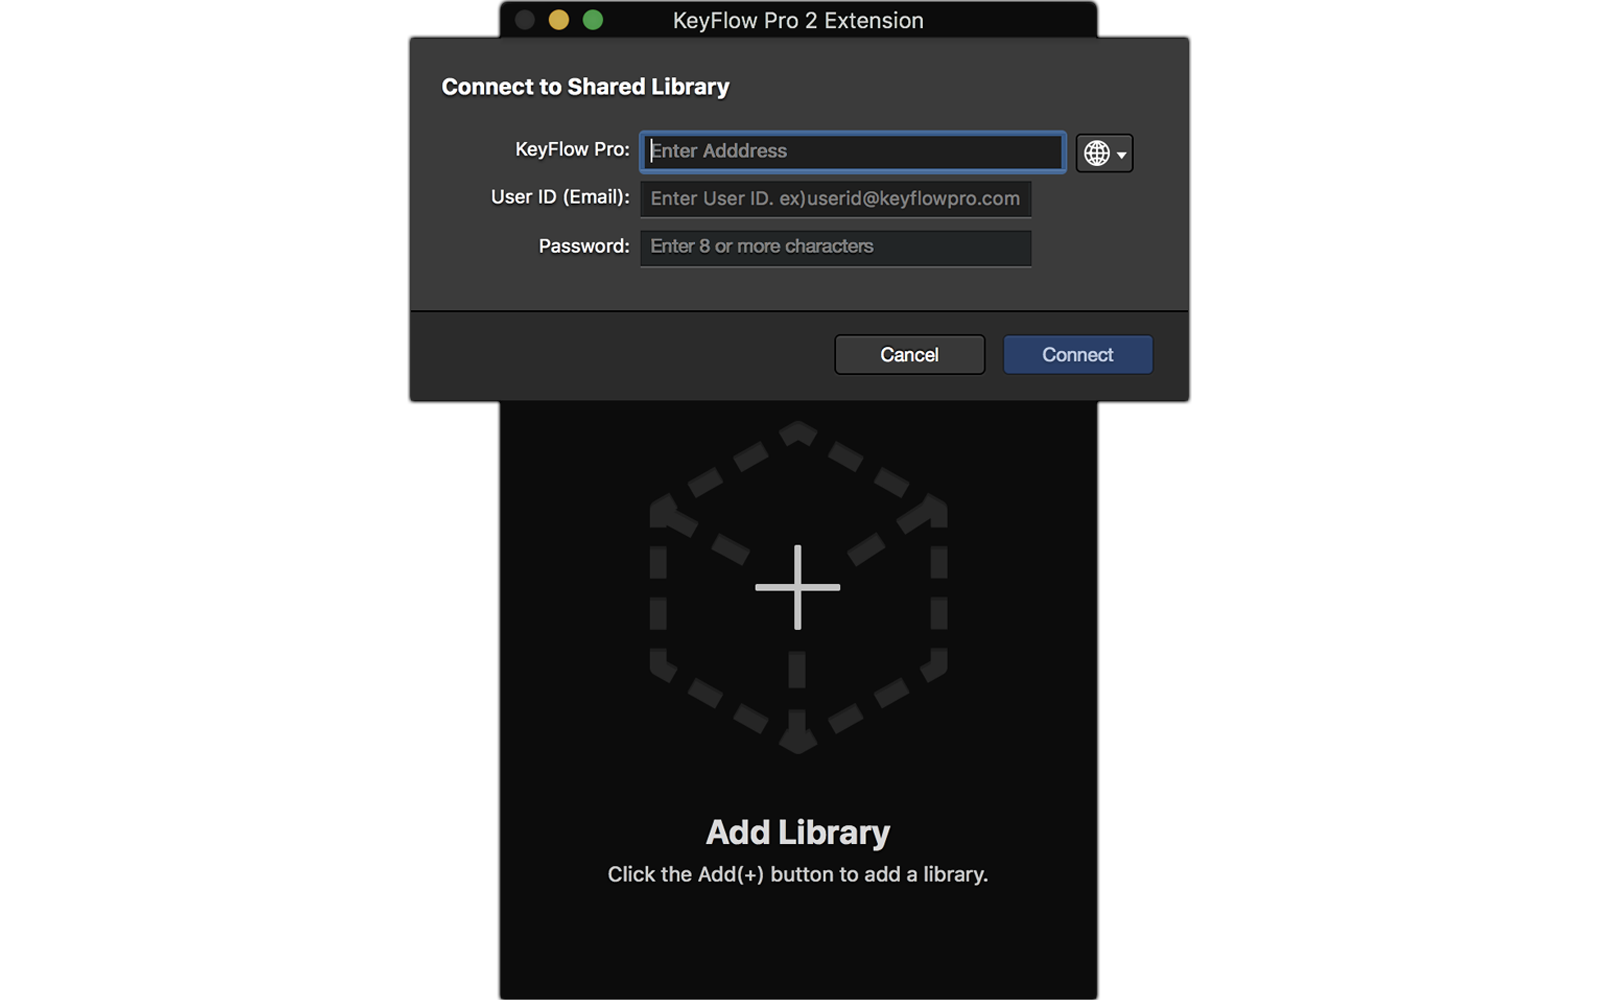
1.
Click the Add(+) button to connect to shared library.
2.
Enter the KeyFlow Pro 2 server IP address, user ID and password and click ‘Connect’.
3.
Select a library you want to connect, then click OK.
4.
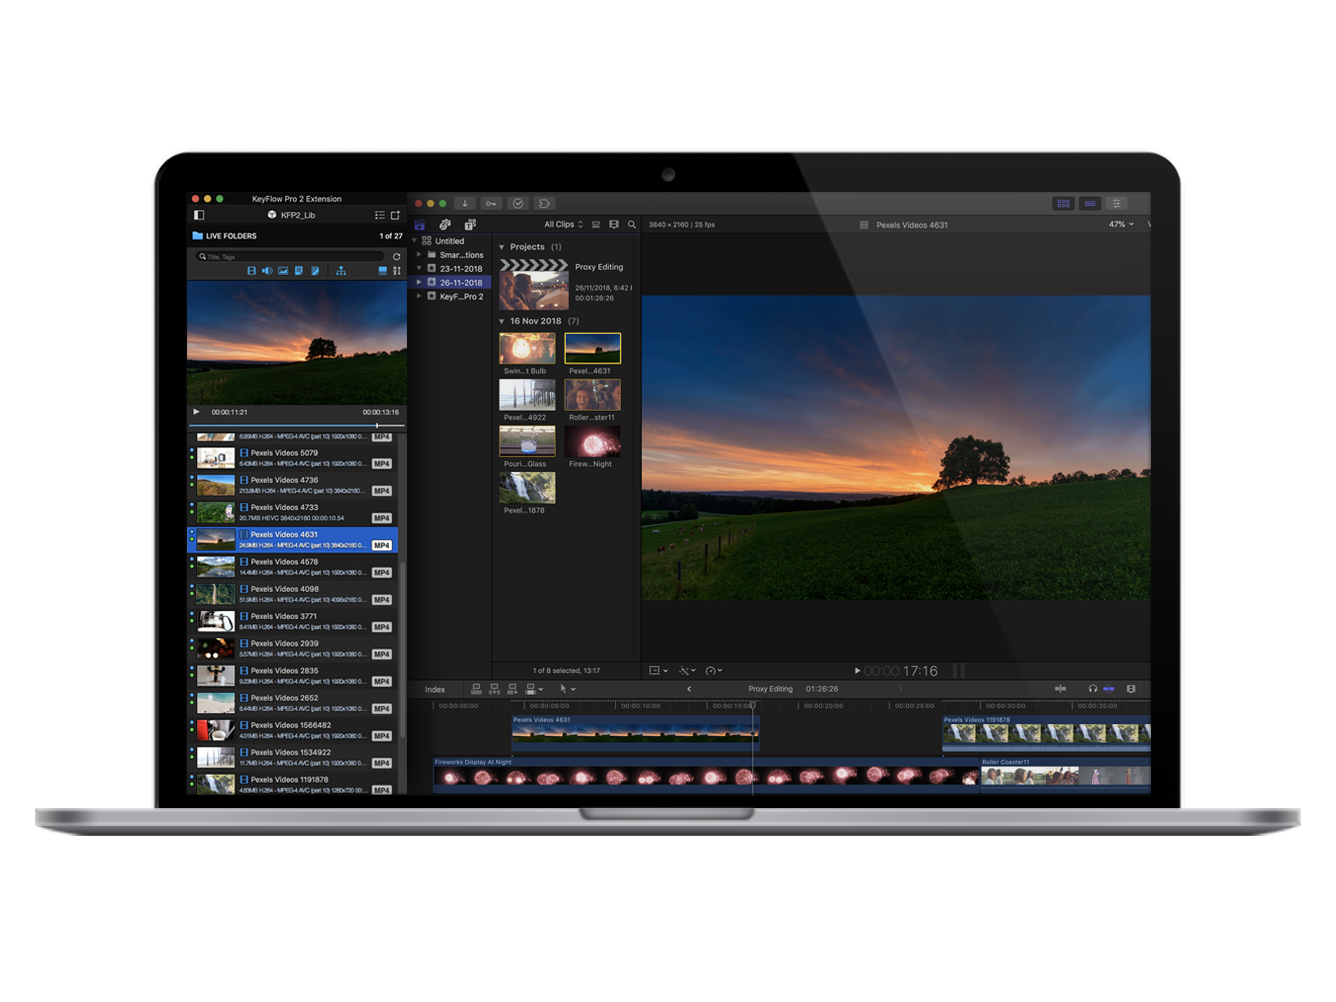
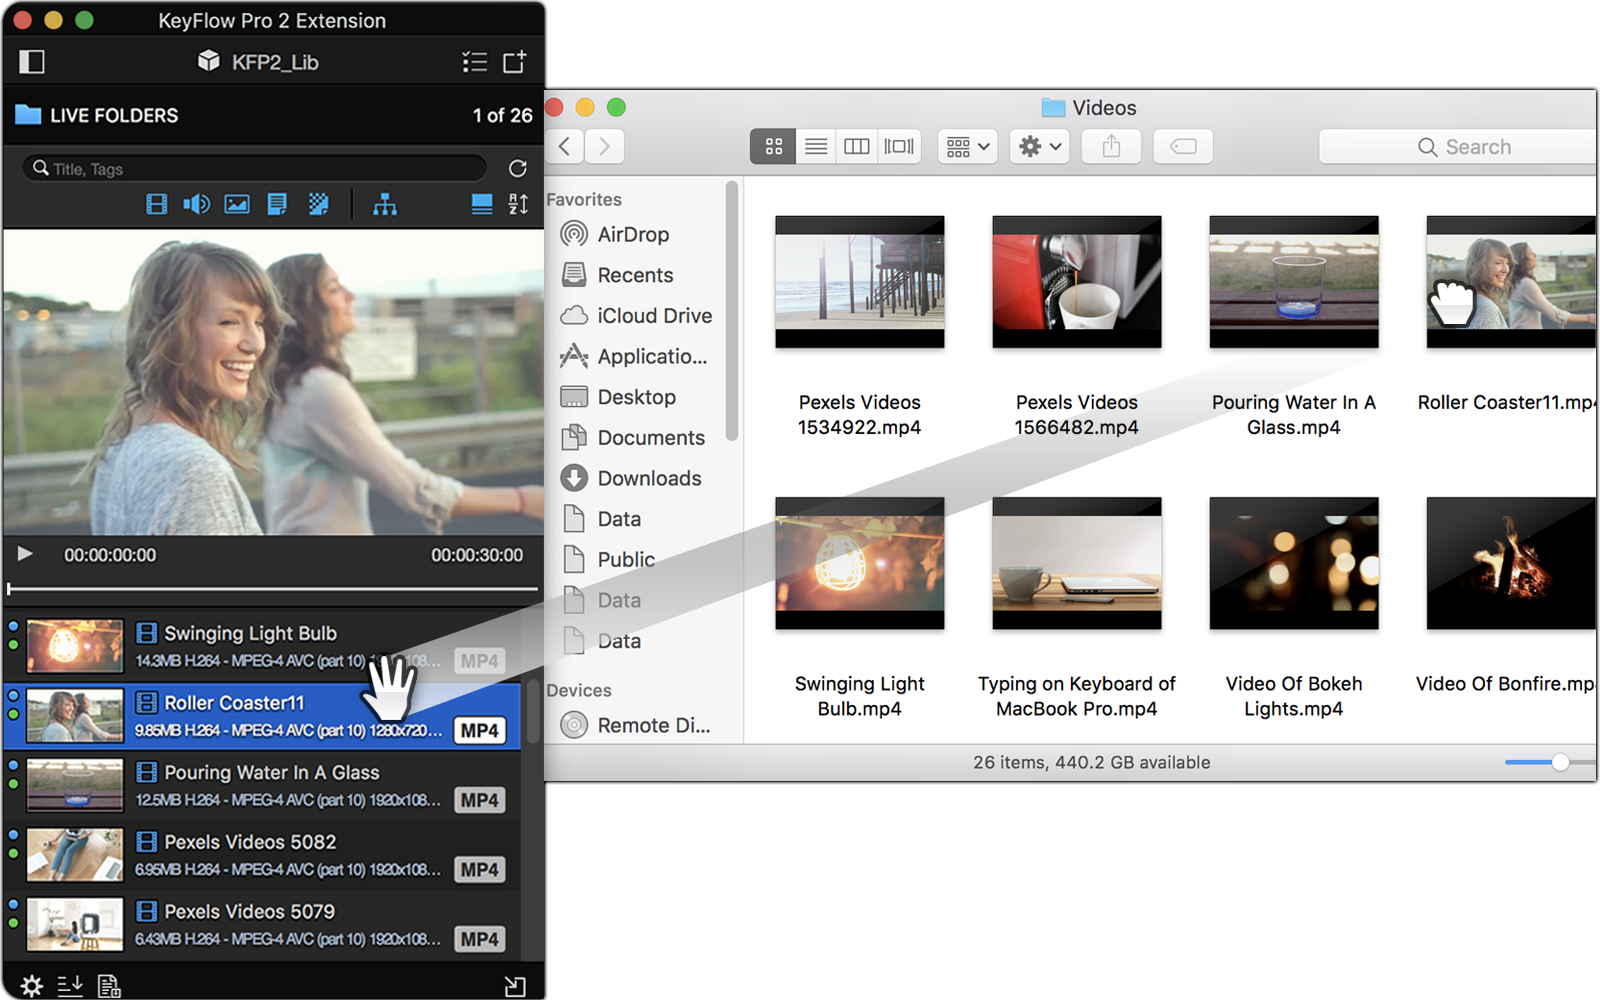
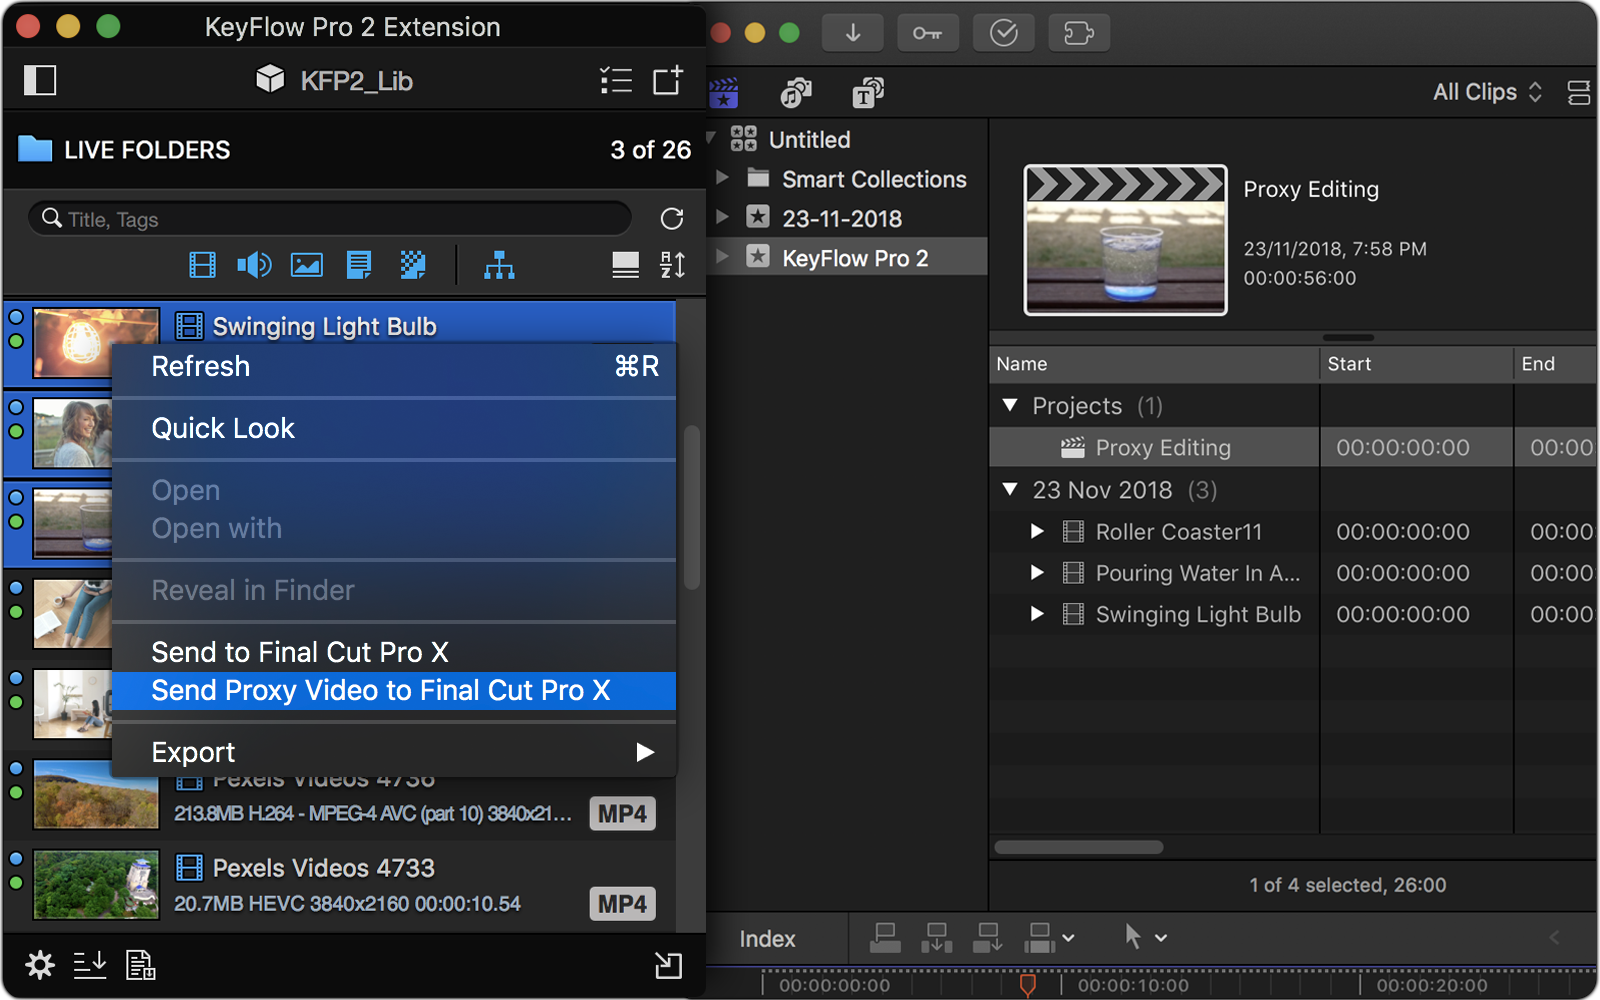
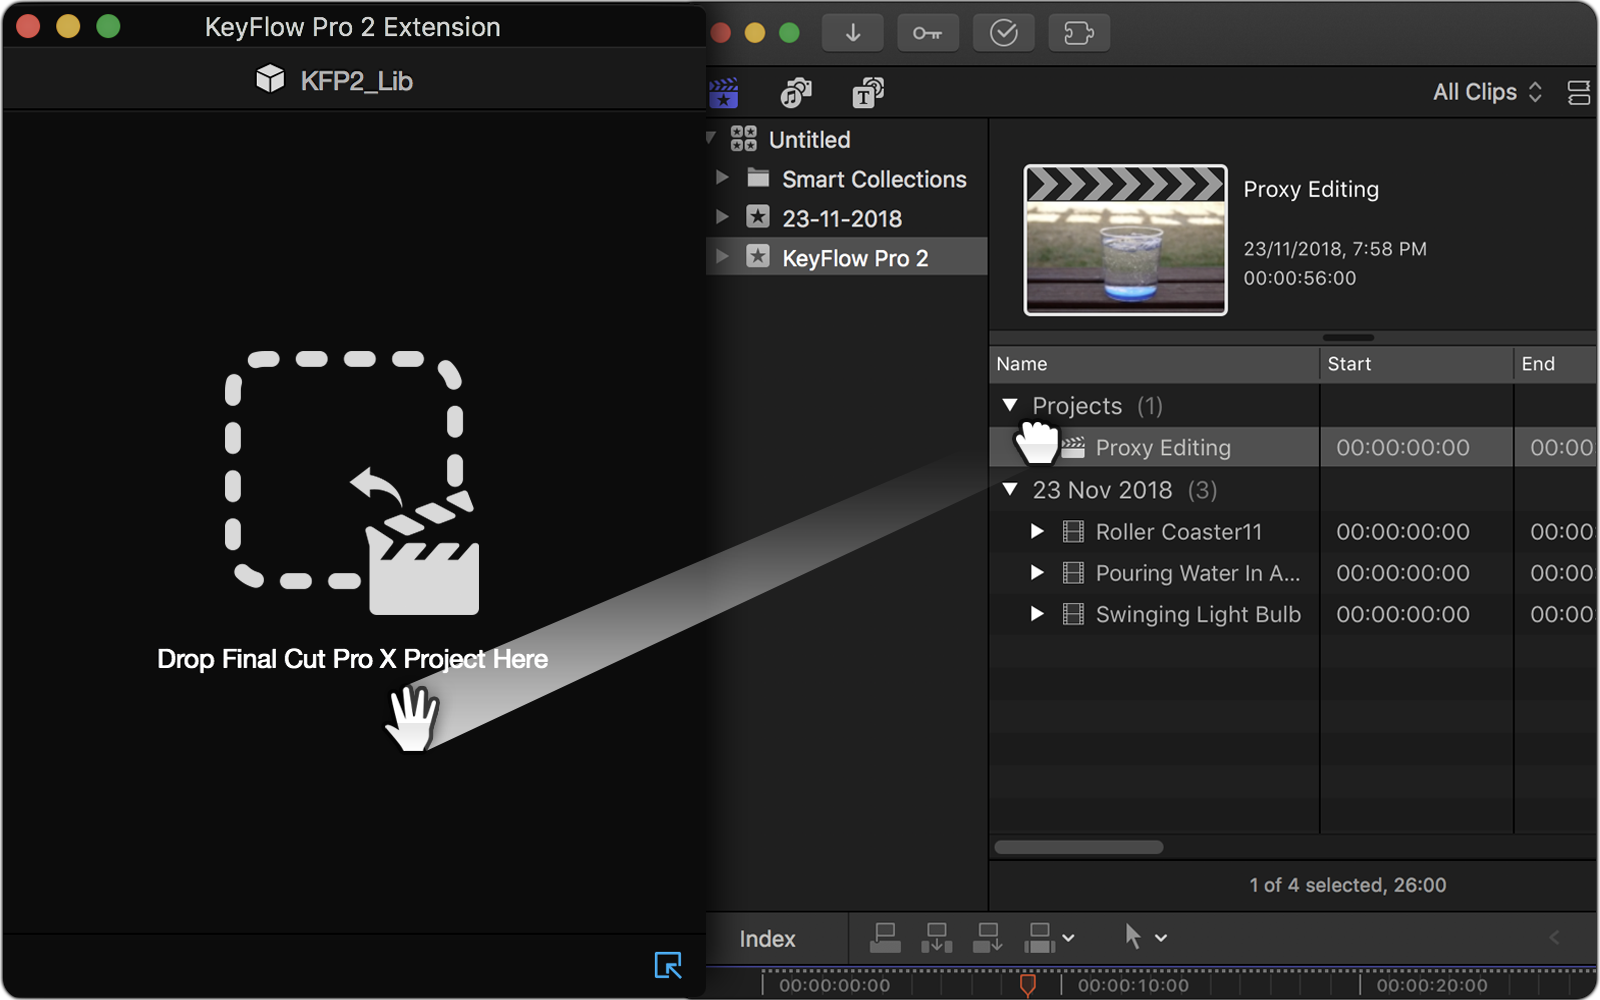
To launch the extension, open Final Cut Pro X and select KeyFlow Pro 2 Extension from Window > Extensions menu.
Note: You have to set up sharable library and create user ID and password in advance from KeyFlow Pro 2 server first.